Your Swing Versus: A 9 Handicap vs Tommy Fleetwood
Published: Last updated:
Your Swing Versus: European No.1 and World No.10 Tommy Fleetwood
Tour pro technique may be out of reach for most of us but, with a better understanding of what separates them from us, we can at least move closer to the action of an elite player.
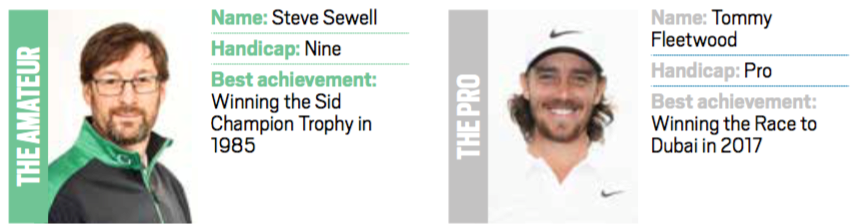
In putting up a regular amateur against a tour star, we aim to uncover just where those differences lie. This month our amateur is nine-handicapper Steve Sewell.
“Steve is a more-than-competent player,”says TG pro Andrew Murray. “However, his action is a good example of the problems caused by overactive arms and an underactive core – a common amateur affliction. By comparing him to Tommy, a player with an exemplary blend of arms and body, we can isolate the keys that will help you move towards a more connected and consistent action.”

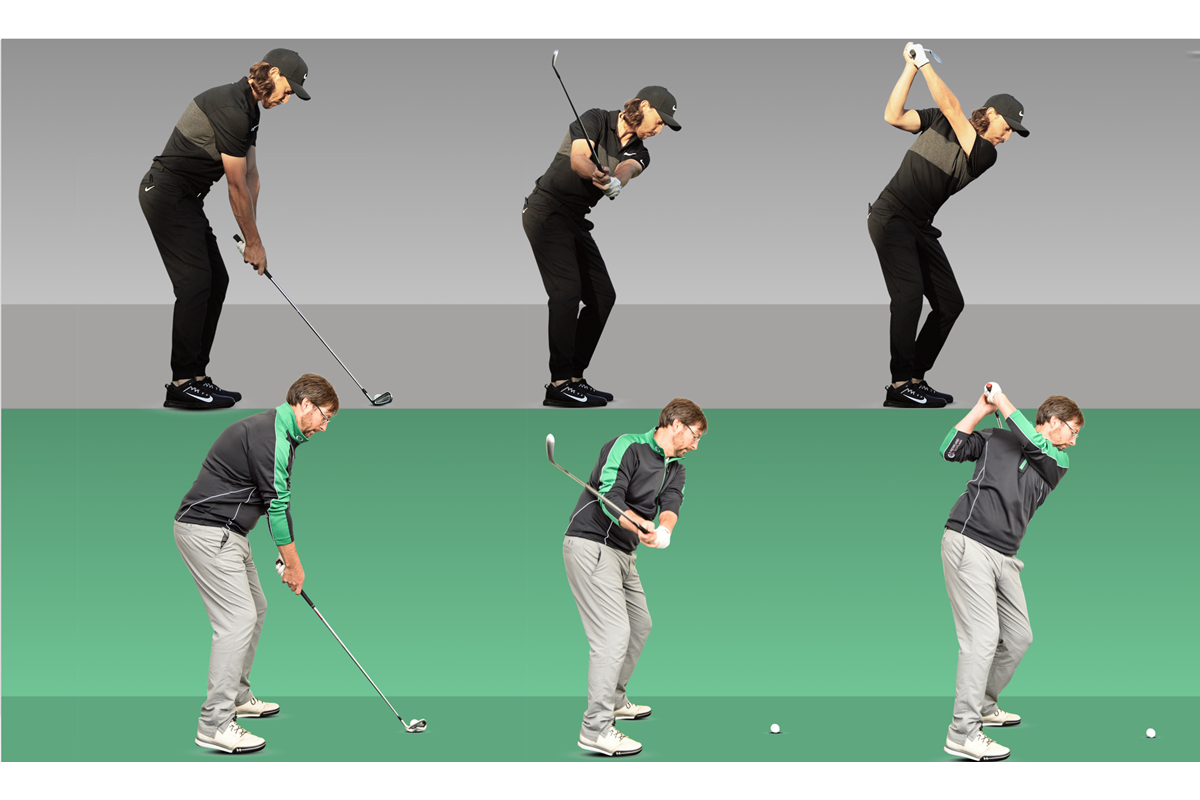
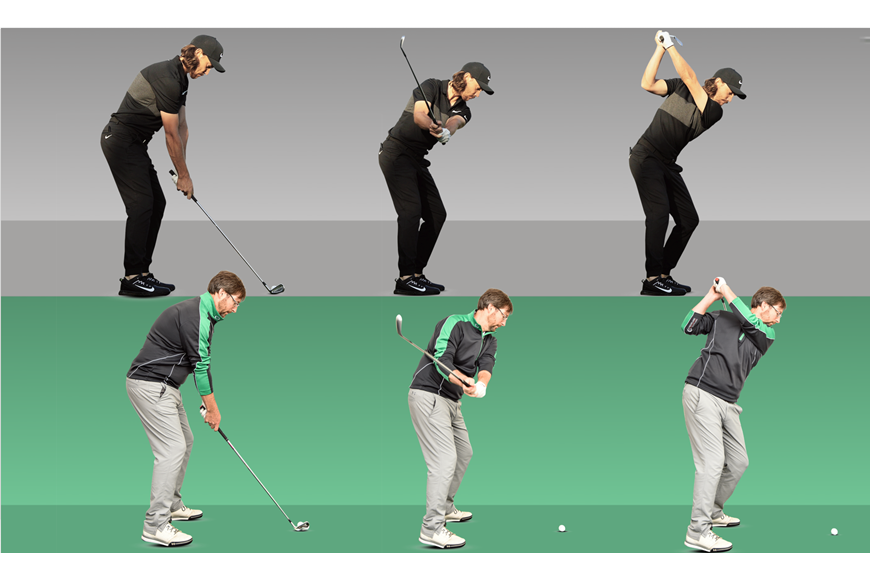
#1: Set Up
At first glance these address positions are similar. Tommy has a slightly more curved spine than some, but still looks so comfortable. That glimpse of his left forearm shows a perfectly neutral and square aim. Steve’s spine is also curved, but in his case it gives him a less athletic posture, which will impact on his swing
#2: Halfway Back
Tommy’s move is spot-on, shaft and left arm in harmony and pointing broadly down the target line. This indicates great arms/body connection and helps him swing on a great plane with plenty of power. With Steve we see a more armsy first move, the club “rolled” away from the ball and the shaft already aiming right.
#3: Top Of Backswing
Tommy shows fabulous flexibility and power to wind up to this position. This rotation is in perfect balance and his shaft is straight down the target line. In contrast Steve’s poor core rotation sees him “let go” of the club to complete his backswing, shown by that gap between his gloved thumb and right palm.
In order: Set Up, Halfway Back & Top of The Backswing
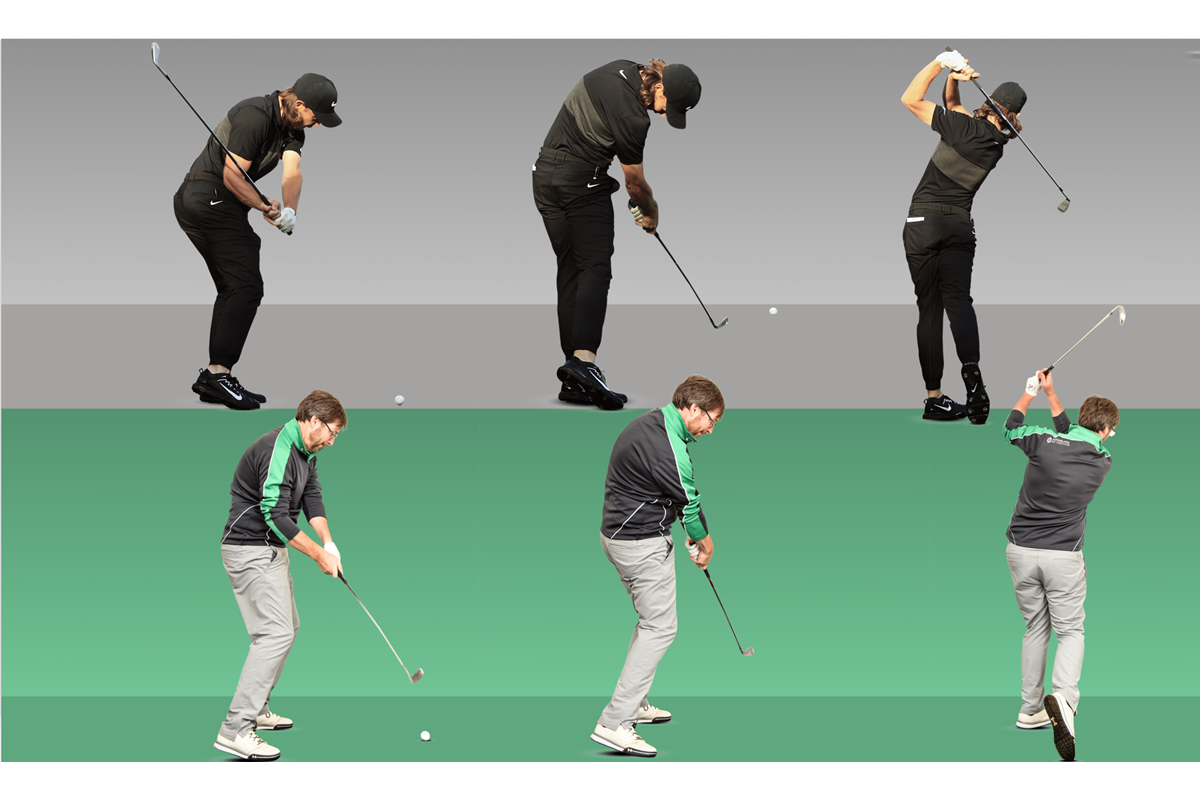
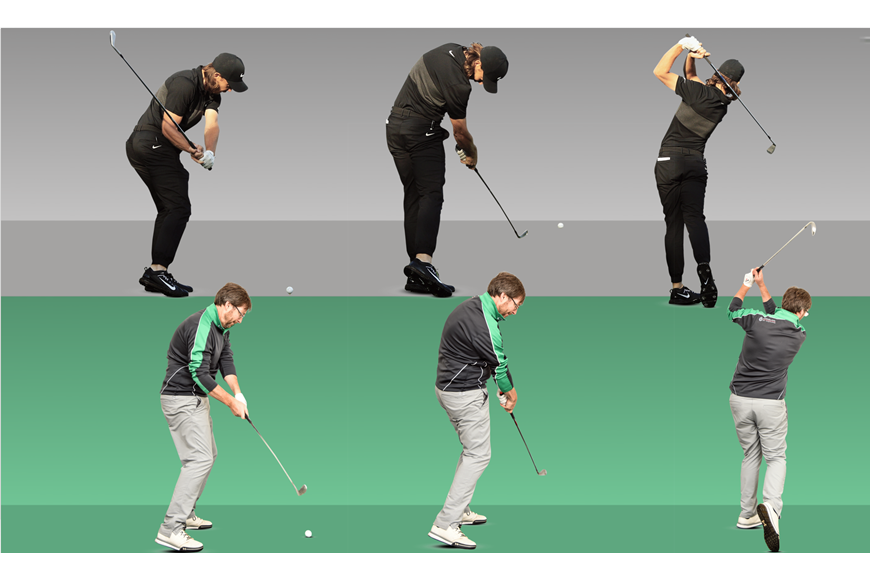
#4: Delivery
Tommy’s position is an incredible illustration of just how active the lower body can be on downswing. His dynamic drive through his hips and legs drops the club on an inside path to deliver a solid blow. In contrast, Steve is moving the club mostly through his hands and arms, throwing it outside the ideal line.
#5: Through The Ball
Steve’s previous lack of rotation is reflected in his impact position, which is very side-on – we can barely see that lead hip, which should be rotating and clearing. He is relying on his hands to release the club and square the face. Tommy’s extension down the target line is permitted by his much more active core
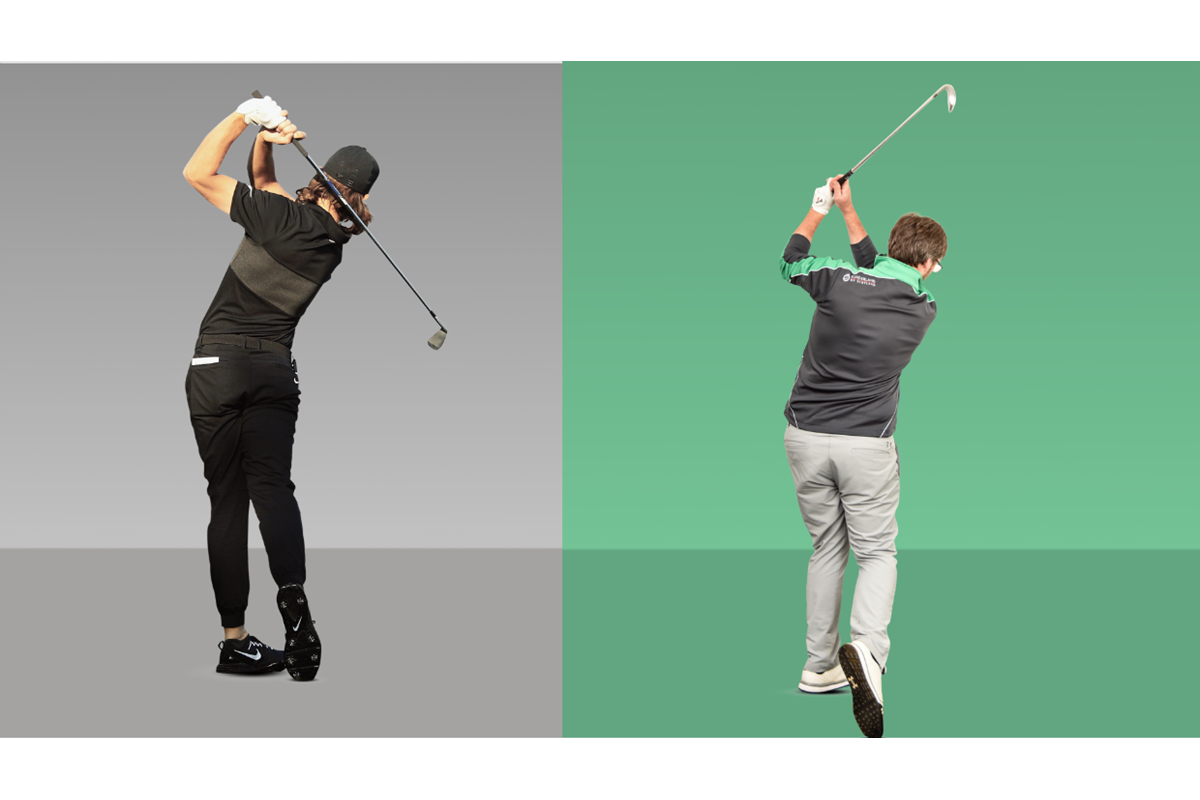
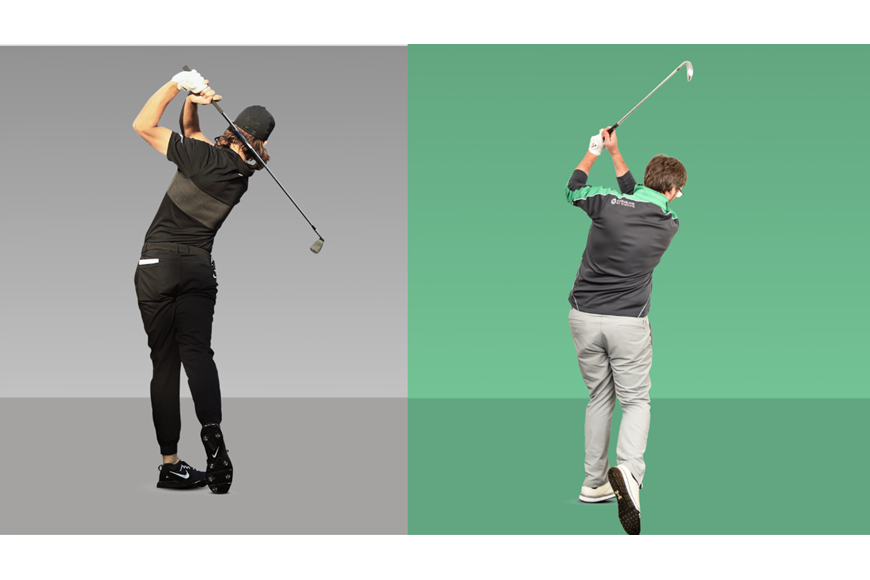
#6: The Finish
My favourite barometer of the swing, and Tommy’s is hot – poise, balance, right sole facing the camera and his chest to target. Steve’s finish is a little high and lacking rotation. With a little work on posture and mobility, he’d help his body make a bigger contribution.
In order: Delivery, Through the ball & The Finish