Master every club in your bag
Published: Last updated:


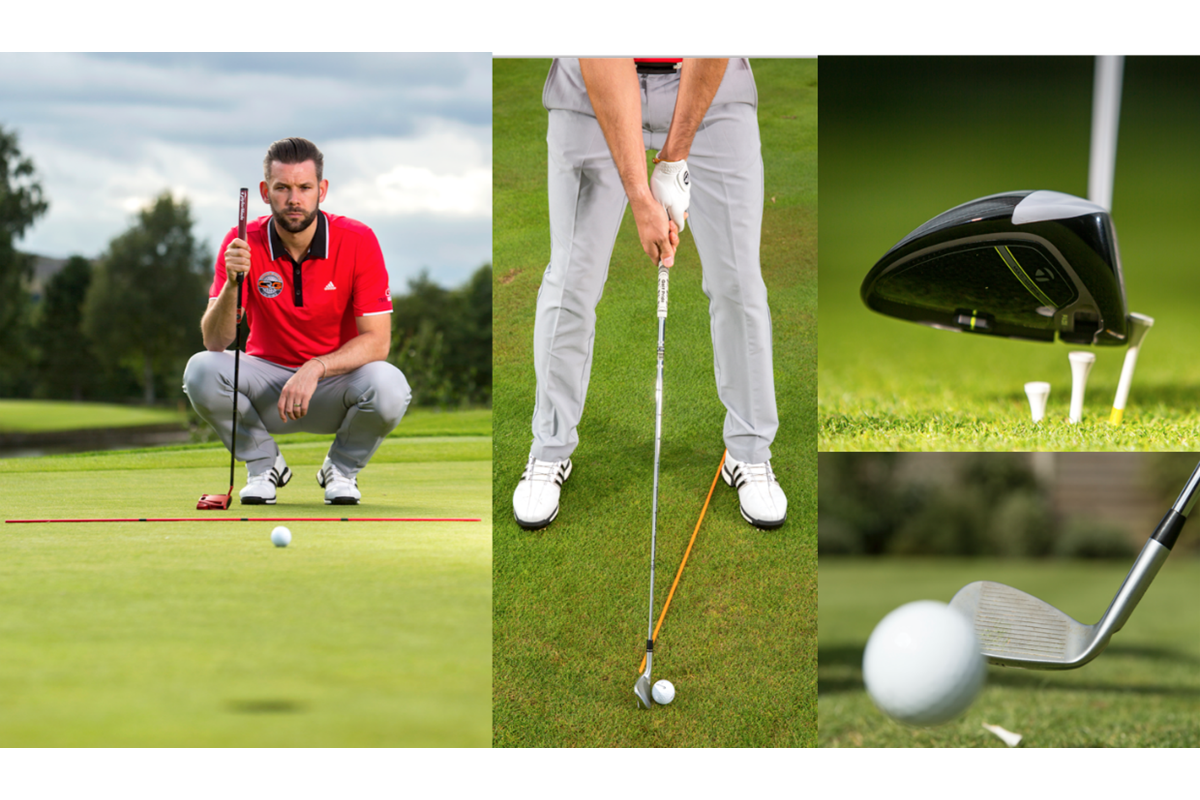
To get more out of your clubs, tailor your approach to each. TG Top 50 coach Chris Ryan shows you how…
While we tend to group golf technique into one desirable set of rules, the fact is that your set of clubs consists of a range of weapons, designed to achieve differing objectives and demanding different key skills.
Here, TG Top 50 coach Chris Ryan takes the four major kinds of club – woods, irons, wedges and putter – and identifies the specific area of technique you need to focus on if you’re going to make your fastest progress.
Simple drills will help you work on those key skills, giving your game a welcome all-round improvement. Tailor your approach to each club in the bag… and watch your handicap tumble.
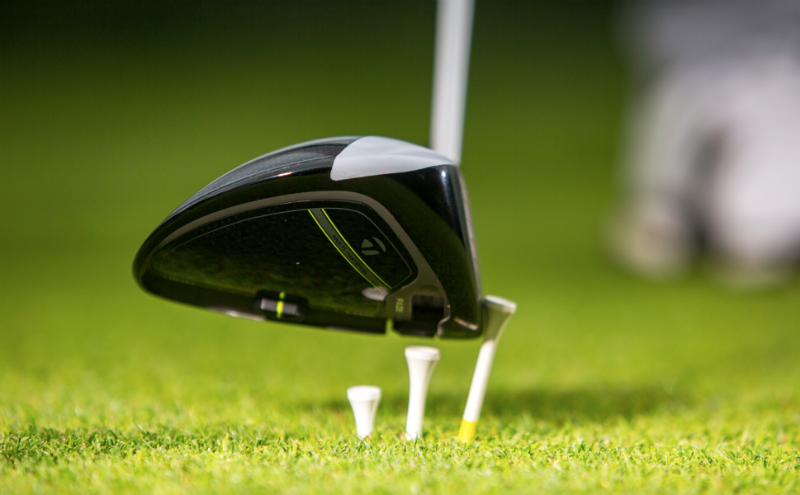
For hitting better drivers and woods: Find the club’s centre, at speed
Here we take at how to build more speed, and two drills: The Tee Gate Drill, and the Tee Tower Drill
Drivers and fairway woods are about power – and power is about creating force in the club and allowing it to transfer its energy to the ball efficiently. That’s why the twin wood key skills are the creation of speed and, as only the sweetspot converts speed into distance, a centred strike. We’ll tackle this one first.
1. Tee gate drill
Tee the ball up as normal, but position two more pegs at an angle to frame the clubhead as shown. To train that centre strike, simply practise hitting the ball without disturbing the outer two pegs. If you find yourself hitting the outer tees, don’t start looking for technical reasons; simply keep going with the drill. Your strike will improve simply through increasing your attention on it.
Moment of Truth: If you repeatedly catch the inner peg you will be striking from the toe; contact with the outer peg means heel strikes

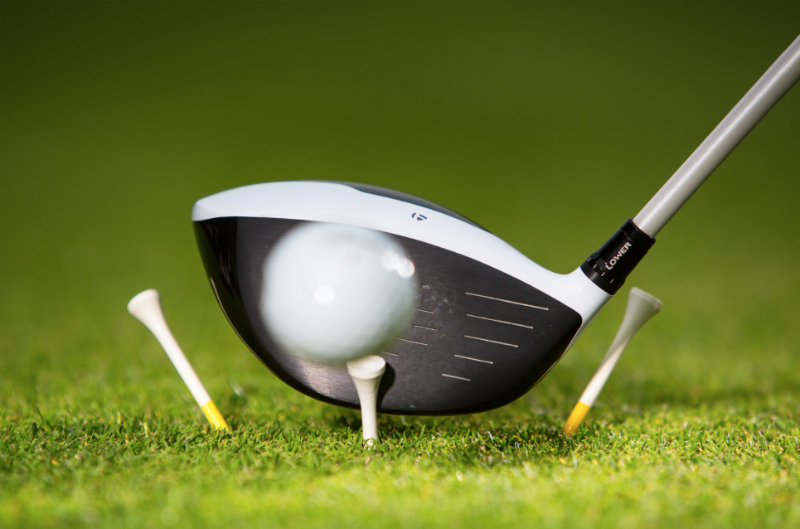
2. Tee tower drill
Just as important is your vertical strike point; strikes towards the sole add spin and de-loft the club, creating a weak launch, while high- in-the-face strikes deliver poor energy transfer.
To train your vertical strike point, set three tees in the ground along your path, each half a ball higher than the next. Practise clipping the highest tee without touching the others.
Tee Clipper: Swing over the top of the tee you’re aiming for and you’ll suffer from low strikes; catch the tee behind it and you’ll tend to strike high in the face.

How To Build More Speed
To create more speed, we’re going to focus on the delivery of the club. People talk about wrist cock, late hit and a right angle between the lead arm and shaft, but when you think about it, this angle releases downwards towards the ground, not forwards into the ball. There is little power in wrist cock as such.
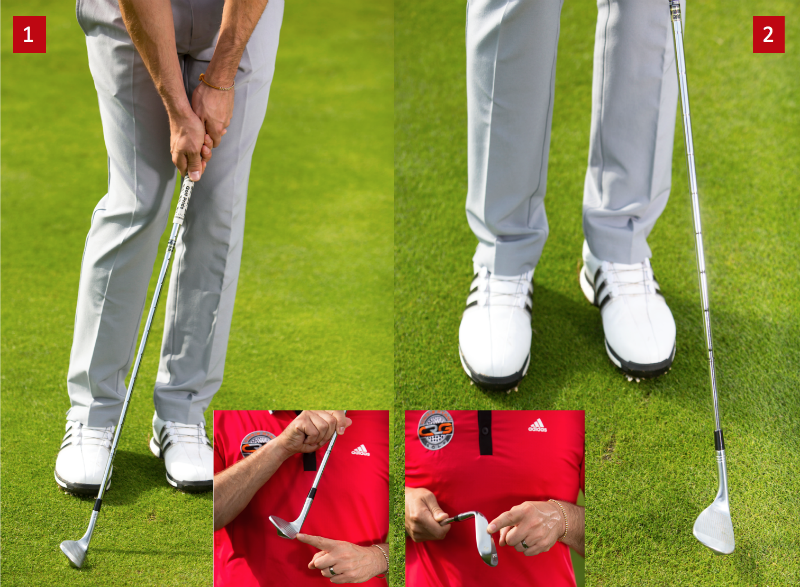
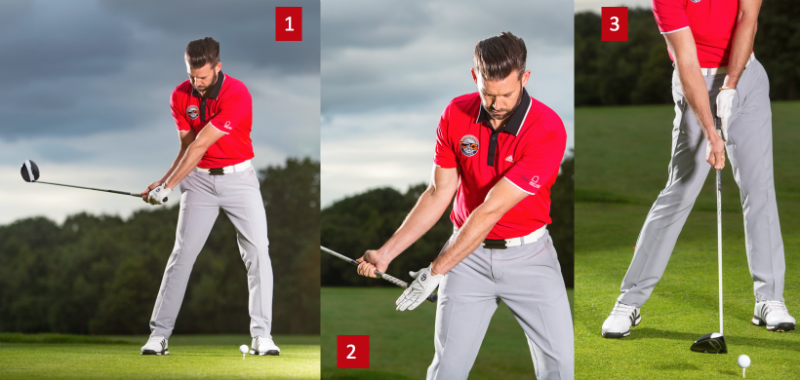
1. Rotation is key: Instead, for more speed you need to grasp that a speedy release comes from the rotation of the lead arm. The faster the lead forearm rotates, the more speed you can generate.
2. Palm to pocket: To feel what I mean by this, hold the driver in your trail hand only and bring the club down to hip height. Place your lead palm against the grip. Make sure its palm is facing towards your trail-side trouser pocket.
3. Forearm rotates: From this position, Feel both forearms rotating hard to square the club-face at impact. It’s this rotation, rather than any un-cocking, that really creates force, speed and power. Work on this split-hand move slowly at first, before bringing it in to your full swing.

To Strike Pure Irons, Focus on your attack
The fundamental key to sweet, solid ball-striking is the ability to compress the ball. The loft on the face of your irons means that to do that, you must hit slightly down. Launch monitor Trackman recommends 3.2o down for a 6-iron and 3.9o down for a wedge. That’s not a massive amount. Here are two ways to promote that subtle but vital descending blow.
Think ‘central-to-forward’
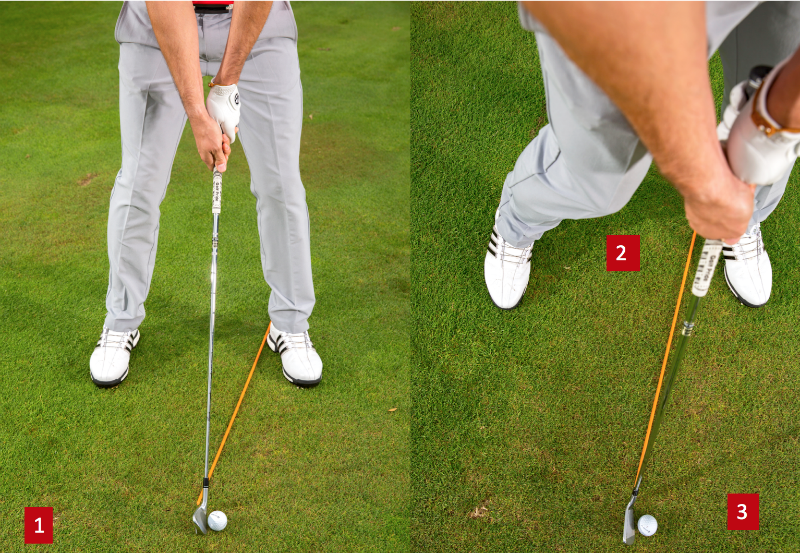
Impact: Increase the gap The ideal downswing sees a weight shift into your lead side, giving your swing a central-to-forward feel. Check this by ensuring the gap between the hip and cane increases.
1. A new low: Encourage this shift by feeling your trail knee move towards the target, not out at the ball. This helps push your lead chest and low point slightly further forward, guaranteeing that smooth downward blow.
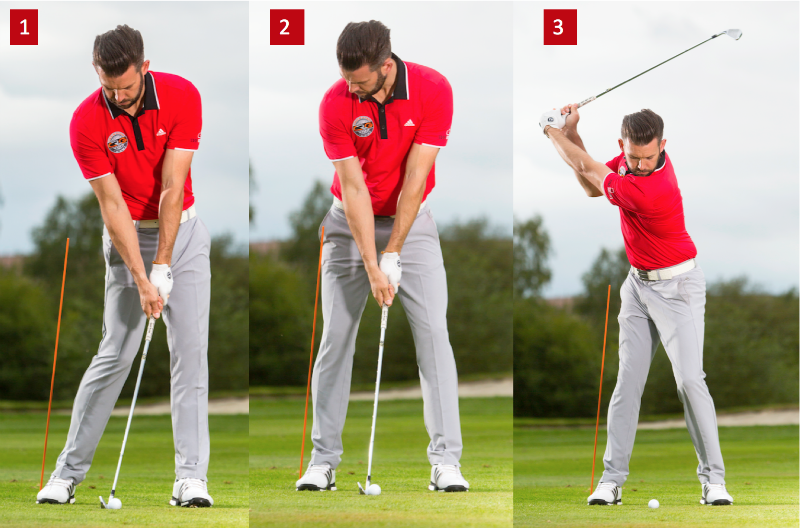
2. Set Up: Trail hip guide Take your regular set-up, playing the ball centrally. This puts the swing’s low point – under your lead chest – hole side of the ball. Place a cane, brolly or old shaft just outside your trail foot, angled slightly inwards to copy the angle of the trail leg
3. At the top: Create a gap As you rotate, look to create a small gap between the cane and hip, giving a feeling of turning over the ball, not swaying. A sway moves the swing’s low point back, promoting an upward attack

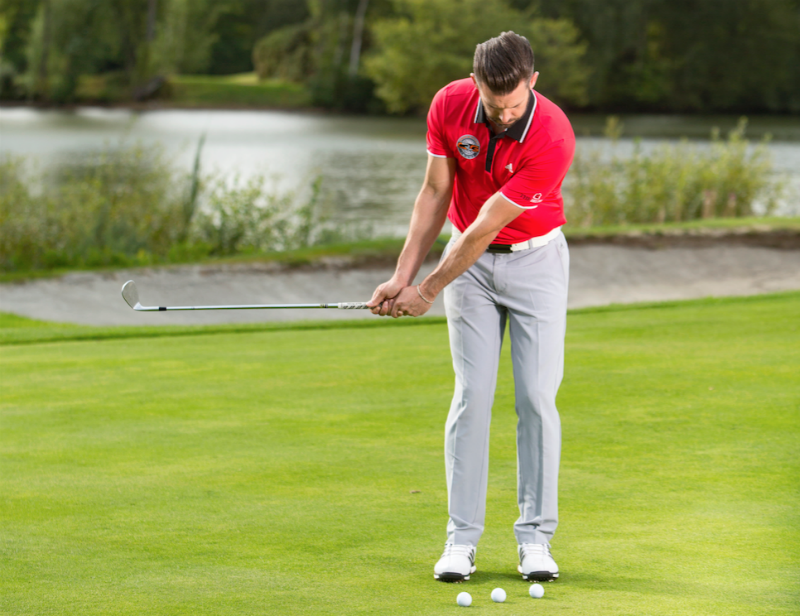
Focus on shaft angle
1. Close the gap: The cane on the ground acts as an effective guide for the forward lean you need to create in the shaft at impact. Feel that lean by pushing your hands forward to match your shaft with the cane
2. Rehearse Impact: Having felt the correct shaft lean, create it within a staged impact position. Push your weight into your lead side and feel your trail knee work towards the target. From here hit half-shots, looking to swing through the impact position you’ve just rehearsed. Check ground contact comes after the ball. Finally, when you feel con dent, move into the full swing
3. Ground cane reference: With your regular stance and ball position, run your cane from your lead heel to the back of the clubhead. At address look down; you’ll see a gap between the cane and the line of the shaft.

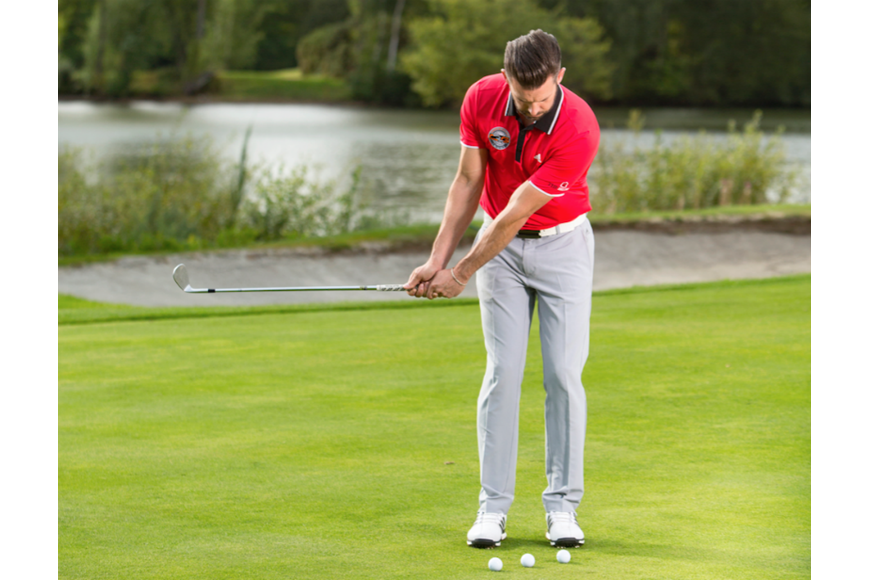
To master your wedges, gain control of ground contact
The real key to a better wedge game is gaining control over flight and spin. To find this control you need to master the delivery of the club; and the best way to do this is to focus on how the sole of the wedge makes contact with the turf. Follow this guide.
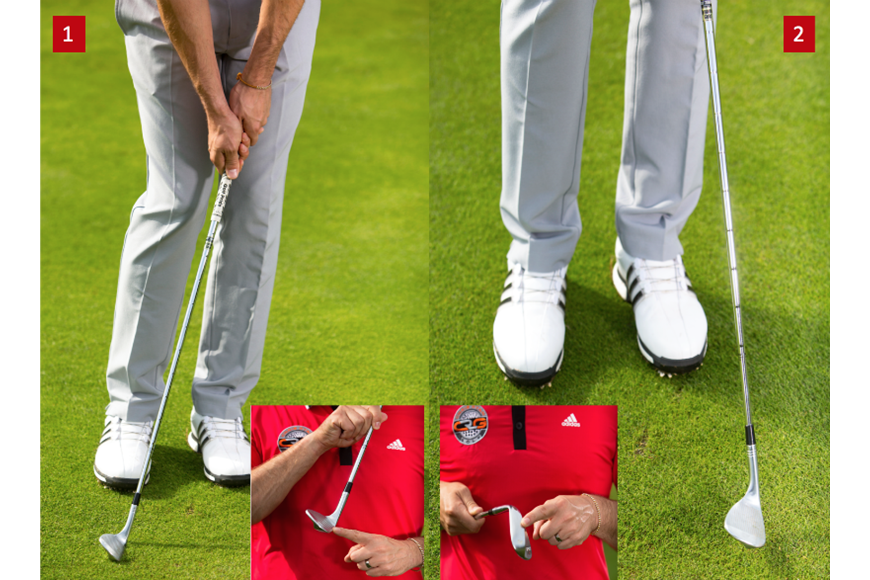
1. Front-edge strike
Whenever you feel the wedge dig or bite into the turf, the club is contacting the ground with this leading edge. As we can see, the more lean there is in the shaft, the more you present the front edge to the turf. Leaning the shaft forward also delofts the club, making this type of ground contact ideal for when you want to fire the ball in low. Creating less loft also tends to take spin off the ball, helping a low flight, though attack angle can mediate this
The ‘dig’ impact: Place your wedge in front of you and lean the grip end forwards. Notice how the more angle you create in the shaft, the more the front, leading edge of the sole drops down.
2. ‘Brushing’ strike
When you feel the sole of the club brush the ground firmly, without biting or taking a divot, it’s the rear of the sole that’s making contact with the turf. To feel this, allow the clubhead to pass the hands through ‘impact’. When the shaft starts to lean back more through the ball, you are adding loft to the face and promoting a higher flight. More loft means more spin, making this type of contact more suited to shots if you need the ball to land softly.
The ‘brush’ impact: Now switch your attention to the back edge of the sole. Notice how rounded and smooth it is, compared to that sharp leading edge. Picture how, as the shaft becomes more upright or even leans back, this smoother part of the sole drops towards the turf

Develop Your Control of Ground Contact With These Two Steps
Step 1: Ball Position
Ball position is the easiest way to give yourself a grounding in creating these two types of turf
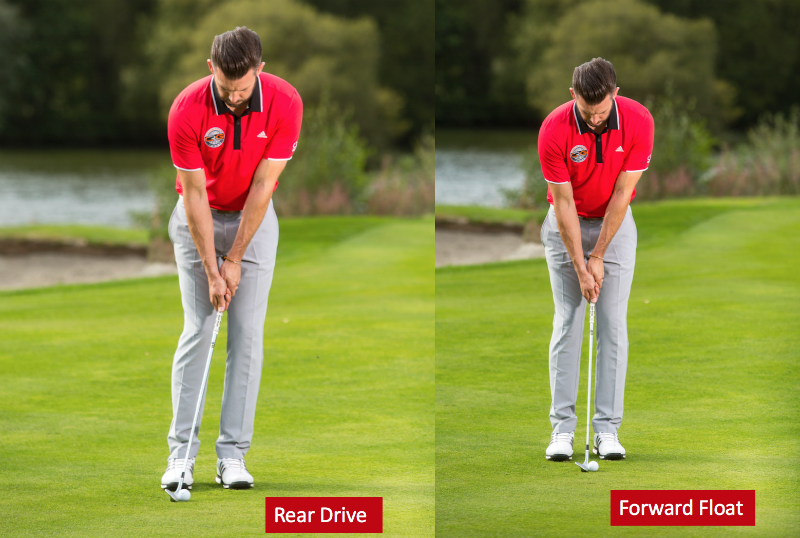
Rear drive: Start by playing the ball off your back foot. Note how this naturally creates shaft lean and pushes that sharp leading edge into the turf. Keeping your hands quiet, turn back and through to create the delofted, digging strike.
Forward float: Now move the ball forward to under your shirt buttons. Make sure the shaft is more vertical. Again, use your bigger core muscles to move the club back and through; feel how the shaft promotes rear sole contact, and a strike that bruises the turf.

Step 2: Use skill
While ball position is an easy, basic way to promote both kinds of ground contact, you can also create both through the way you release the club. Delay the release, keeping your hands ahead of the clubhead, and you can get the leading edge to dig even from a forward ball position; using a bit more lower hand allows you to find that more lofted, brushing contact even with the ball back in your stance.
If you can educate your hands to dig or brush at will, you will have created a skill that allows you to create any combination of flight and spin you want… giving you a truly versatile short game.
Random Contact: To develop this skill, hit pitch shots randomly from a forward, middle and rear ball position. On each shot, call which type of ground contact you are going to make – dig or brush.
Hand Education: Try driving one in low off the front foot; see how good you can get at cutting one up from the back. Observe how flight and spin change with each delivery. Above all, discover how, by focusing on ground contact, you can educate your hands to create a massive range of short-game shots.

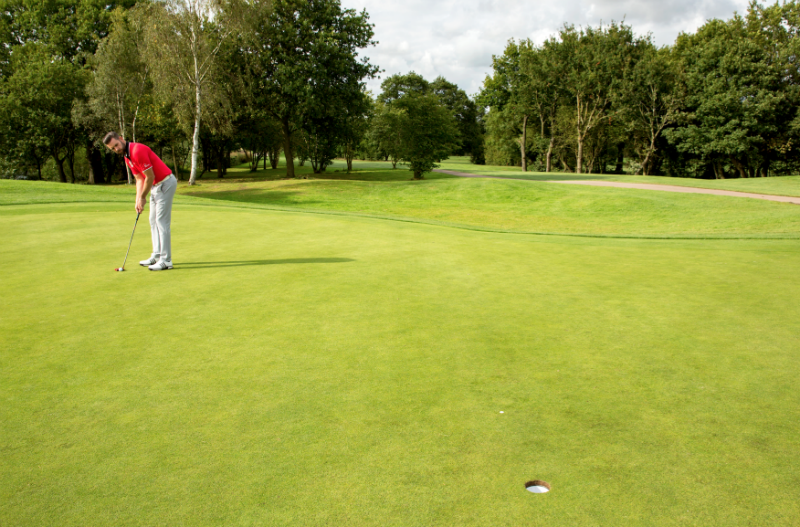
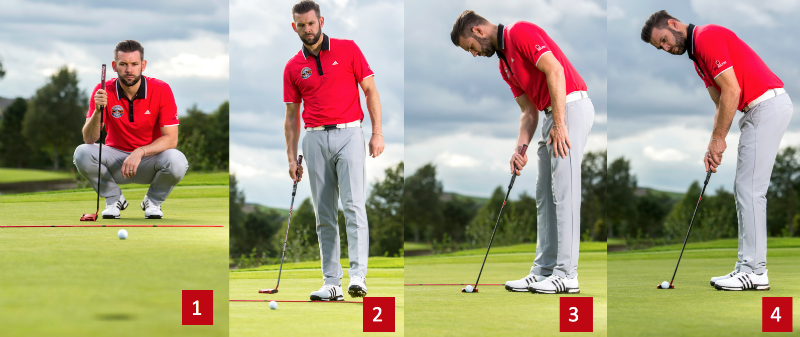
To hole more putts, improve your rhythm and flow
Of course technique is part of good putting, but you will putt your best when you feel inspired and con dent. To get into that state you need to improve your perception of the putt, the rhythm of the stroke and your ability to ow smoothly into execution. Use this three-stage plan.
Improve your perception
Blind test: To an extent we all putt ‘blind’ – in other words, we don’t look at the hole as we putt. That means we are reliant on our perception of where the hole is. But how good is yours? To find out, set up to a straight 20ft putt. Address the ball… then close your eyes.
Reality check: With your eyes still shut, walk down towards the hole and put the butt of the putter where you think it is. Now open them and see how close your perception matched reality. The better this becomes, the more accurately you will putt.

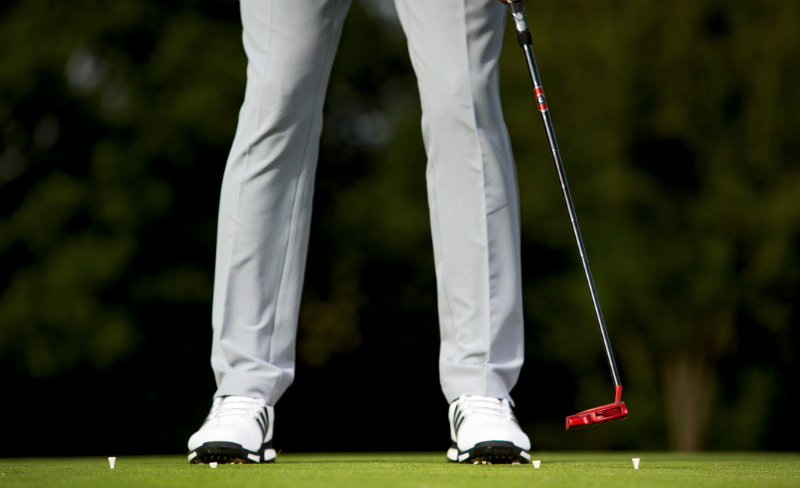
Improve your rhythm Tempo
For a great way to make your stroke smoother, think in terms of how long your stroke takes. Good tempo means that, whatever the length of the putt, the stroke takes the same length of time; the putter simply moves slower on shorter putts, faster on longer ones.
Work on this by placing four tees either side of the ball to represent a shorter and longer stroke. Count “one, two” as you swing back and through over the inner tees; then keep the same “one-two’ count pace for the outer tees. That pace is personal to you, but keep it constant and you’ll feel better ow in your stroke

Improve your flow: Use a routine
Familiarity breeds confidence and a state of ow, and that’s why a regular pre-shot routine puts you into a more effective state of mind over the ball. Use this four-stage process as a guide.
1. Read the putt: Use your eyes and feet to see and feel slopes. Observe the putts of others. But keep this information-gathering stage separate from execution. You can even picture a line behind the ball to help.
2. Step in: Only once you have convinced yourself of the right pace and direction should you step over that line. Mentally, you should feel totally committed to your read at this stage.
3. Aim the face: Face aim makes by far the biggest contribution to the ball’s starting direction, so once over the ball your first job is to aim it squarely at the path you have identified. Eyes over the ball will help you.
4. Step in: Once you’re happy with the aim of the blade, set up around the putter’s position. It will help you find your most effective stance. Make one more look to reconnect with your target before pulling the trigger.