David Leadbetter: How to improve your consistency with 3 simple drills
Published: Last updated:


We can all hit good shots; it’s hitting them regularly that matters. How do you achieve more consistency? David Leadbetter knows…
Legendary coach David Leadbetter says he hasn’t come across the perfect swing yet, and doesn’t think he ever will.
“If we were all built the same, maybe you could find the perfect swing,” he explains. “As it is, everyone is different and we all have our own little idiosyncrasies and tendencies. The goal should always be to find the best swing which works for you.”
To do that, Leadbetter believes the key is to forget one of golf’s biggest misnomers. “Because we all hold the club with our hands and arms, everybody assumes that’s what controls the swing,” says the former coach of Nick Faldo and Nick Price.
“Yes, your hands are important, but the power and energy comes from your body. One of my favourite expressions in golf instruction is that the dog (the body) has to wag the tail (the hands, arms and club); the tail does not wag the dog.”
To get everything working in the correct manner, you need to break the swing down into three aspects. The first component is the way you set up to the ball. That includes your grip, posture, ball position and alignment. The second component is the sequence of motion and how the body would move if you didn’t have any arms.”
And the third component is the synchronisation between the hands, arms and body. If you can nail these basics, it will be far easier to hit the ball consistently. Here’s how you do it…
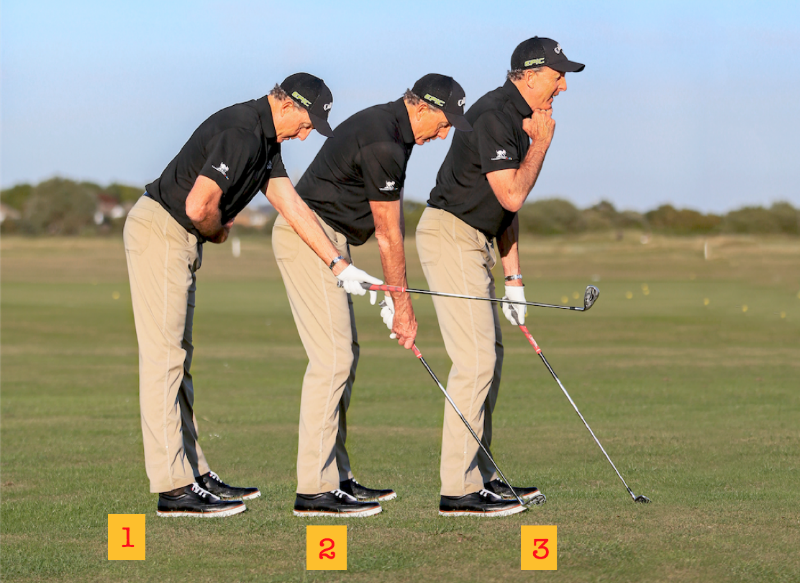
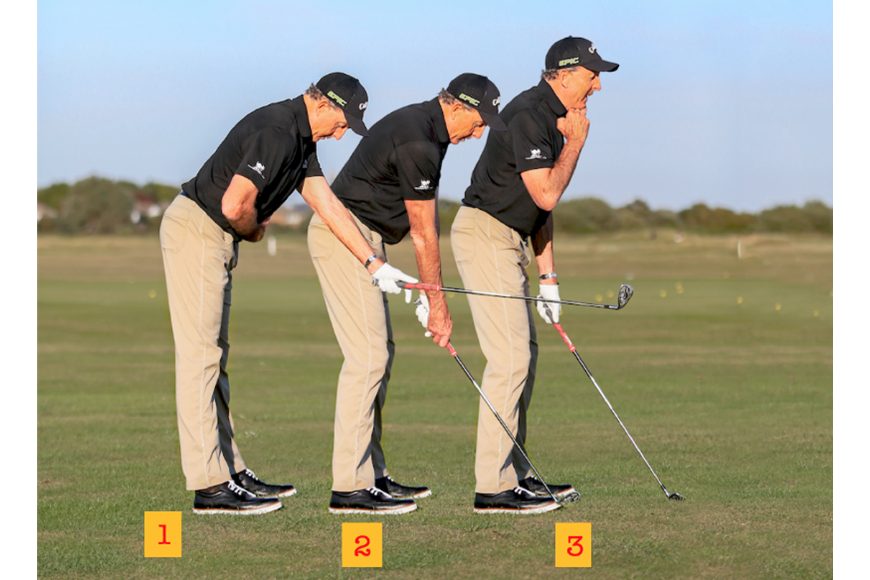
My Favourite Posture Drill
To achieve a relaxed yet athletic posture, you need to set your upper and lower body at the correct angle. Start by holding the club up in front of you so the shaft points straight up. Keeping the legs straight, bend forward from the hips until you feel a tightening in the back of your hamstrings and calves (1).
With the arms hanging naturally, soften the knees and lower the club until the sole rests on the (2).
You should be in a position where the lower back is straight, the shoulder blades are back and the chin is sitting up slightly (3).

The latter will give the shoulders some freedom to travel under the chin, rather than creating a locked position which rounds the shoulders and creates tension. To ensure you’re standing the correct distance away from the ball, check that your elbows are slightly bowed and the upper arms are lightly resting either side of your pecs. If there’s no connection, you’re standing too far from the ball. If your elbows rest on your chest, you’re standing too close.
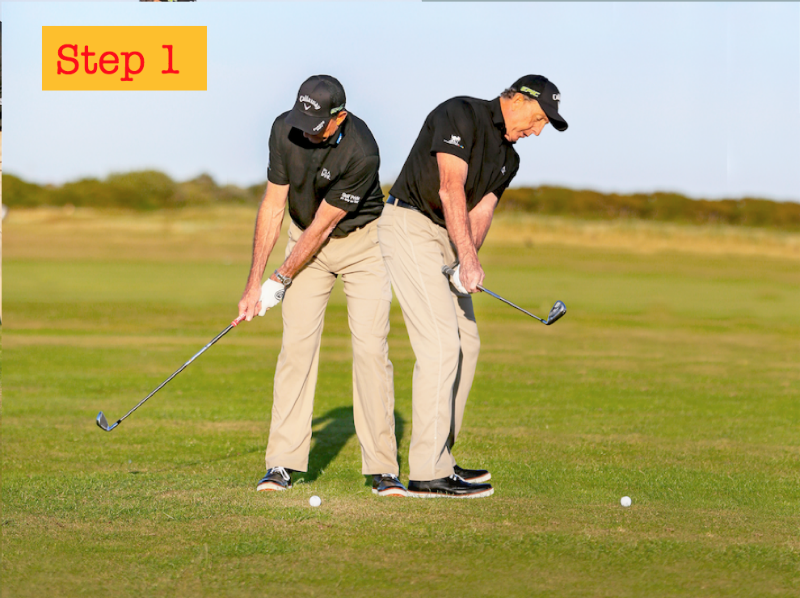
Top Tip: The biggest lesson for the average golfer is to keep things simple. One of the greatest teachers ever was John Jacobs (right) and he was very simple in his approach. And he got instant results with the average golfer. There is a danger with all the information and resources on YouTube that the golf swing can become really confusing. It’s the old paralysis by analysis syndrome.
Golfers these days have less time to play, less time to practise and yet they are actually making things much more complicated. Unless you can dedicate yourself to understanding the complexities of the technical aspects, you are just filling your head full of facts and theory which will leave you worse off.
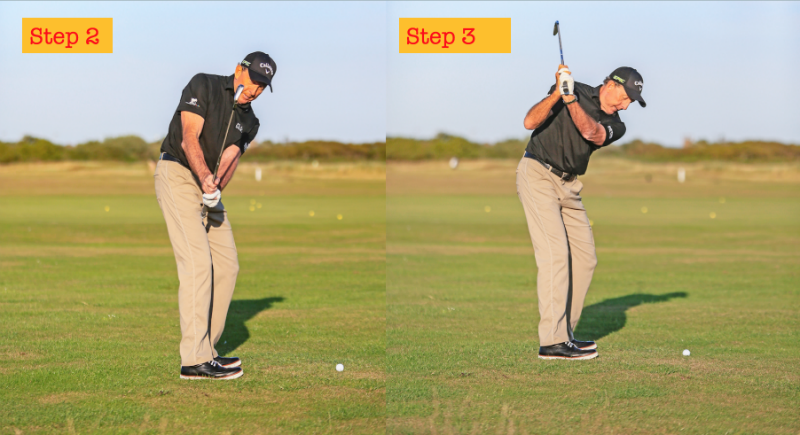
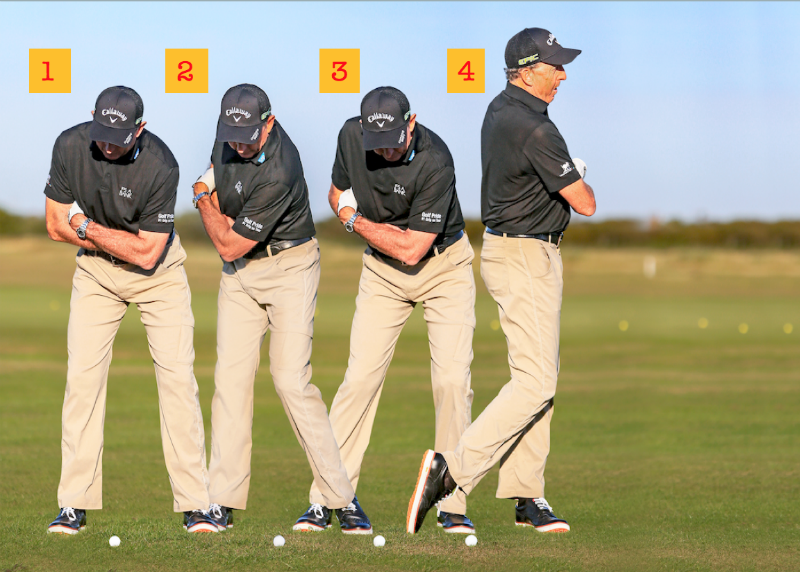
My No.1 Pivot Drill
How the body pivots is the lifeblood of your swing. It is the engine and the power source, so it’s essential that you train your body how to coil and uncoil correctly. Start by positioning your body in an athletic posture and then give yourself a hug by grabbing your obliques (1).
Once set, use your core to wind up into the top of your backswing position, letting the left side move down and the right shoulder tilt upwards (2).
Just before you reach a fully-coiled positioned, try to maximise the torque and power stored by transitioning into the downswing while the upper body is still going back. Let the knees and hips initiate the movement towards the target before unwinding the rest of the body (3)

Complete the motion by stretching the eft side upwards and posing with the chest pointing towards the target (4). To load into your right side with a full body rotation, the upper back should be facing the target with pressure wound in your right heel. If you are very tight or lacking in flexibility, you can raise your left heel very slightly to accommodate this movement.
Top Tip: Part of golf is having a really good pre-shot routine. Some people like to do a few waggles or walk into the ball while picturing the shot. But to make it automatic, you need to practise it. A lot of amateurs tend to forget and under-appreciate that having a set routine is part of the golf swing.
If you look at the pros, they all have a definitive routine. You may not see it on TV, but the time it takes them to hit a shot is almost identical every single time, regardless of whether it’s a pro-am, day one of an event or the closing stages of a Major. That’s the thing they rely on when they are under pressure to help activate the mind and body and produce a consistent swing.
My No.1 Synchronisation Drill
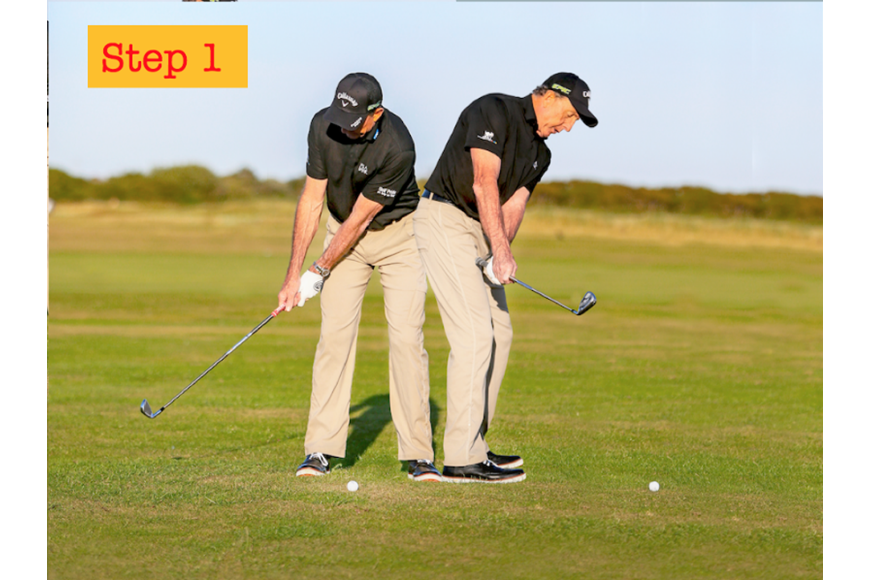
The essence to any good swing is synchronisation, which refers to getting the outside of the clubhead and the inside of the body working in tandem. Most amateur golfers do the opposite, let their hands and arms dictate the pivot and yank the club back on an inside plane too early. As a result, they get stuck behind and tend to loop the club to the outside on the downswing, which can lead to pulls, slices and a loss of power. To keep your swing on plane and ‘in sync’, the clubhead needs to stay outside the line of the hands all the way to the top of the backswing. Here’s how.

Step 1: Don’t be tempted to rotate the forearm or open the club face. The takeaway starts by engaging the core muscles of your abdominal and pushing the club back slightly inside the target line. To do this, the left arm moves across the bottom of the chest, but the left wrist remains in a cupped position – as it was at address.
Step 2: Keeping the right arm above the left arm, let the wrists hinge at just past the midway point so the shaft is almost matching your spine angle. This beyond vertical position going back will shorten the club’s journey to the top and encourage the club to fall and shallow onto the correct plane.
Step 3: As you swing to the top, focus on keeping the left arm connected to the chest to achieve a short and compact motion. This will help to maximise coil and prevent the swing from falling out of sync.

Top Tip: Contrary to popular belief, practice doesn’t make perfect. It makes permanent. So, you need to make sure you are doing the right things; not just hitting ball after ball on the range. You’ve got to practise with purpose. Hitting from different lies or even going out for nine holes on your own and playing with two balls is a great way to practice.
If your short on time, try to incorporate a playing philosophy into your range sessions. In other words, spend 15 minutes of your time playing the course on the range. I see so many players who struggle to take their ‘range game’ onto the first tee, so this will make the transition so much easier.